Enjoy a sweet ending to a traditional meal

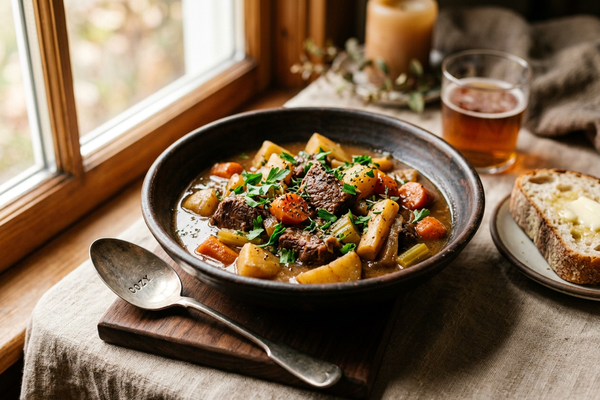
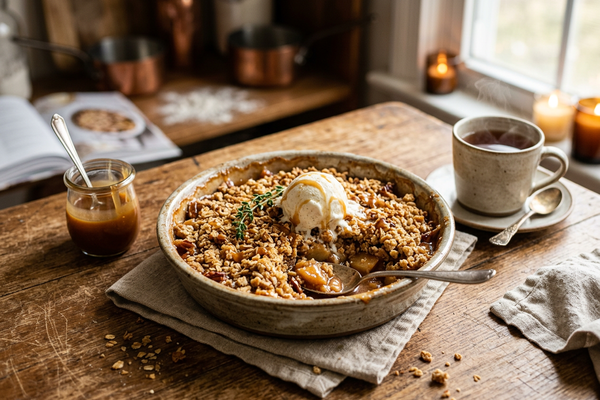
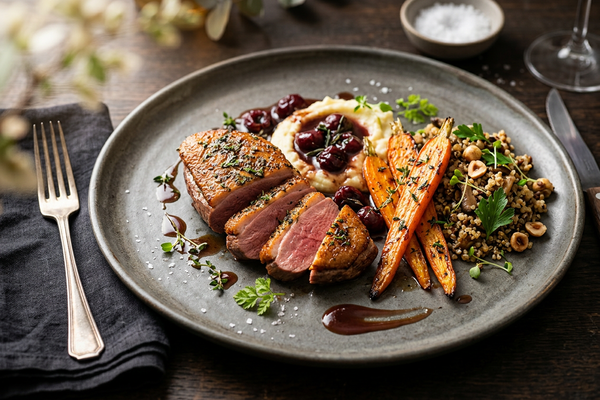
A tasty dessert is the perfect way to cap a meal. But with so many sweet possibilities, many may find it difficult to choose their favorite decadent delicacy.
Custards and puddings often make a great ending to dinner because they are flavorful and can be customized depending on individual tastes. Puddings also are not very filling, meaning there will always be room for a little bit of a treat.
The following recipe for "Leche Frita" from M. Teresa Segura's "Spain" (Fall River Press) is popular throughout northern Spain. It combines a meltingly creamy center with a crunchy coating. The squares can be enjoyed hot or cold.

Leche Frita
(Crisp Custard Squares)
Serves 6

18    fluid ounces creamy milk
3    strips lemon zest
1/2    cinnamon stick
4    ounces superfine sugar, plus extra for dusting
4    tablespoons corn starch
2    tablespoons flour
3    large egg yolks
    Sunflower oil for frying
2    eggs, to coat
6    tablespoons bread crumbs
    Ground cinnamon for dusting
    
Bring the milk, lemon zest, cinnamon stick, and sugar to a boil in a saucepan, stirring gently. Cover and leave off the heat to infuse for 20 minutes.
Put the cornstarch and flour in a bowl and beat in the egg yolks with a wooden spoon. Start adding some of the milk until the batter is smooth. Strain in the rest of the hot milk, then pour back into the pan. Cook over a low heat, stirring continuously. It will not curdle, but does thicken unevenly if you let it. Cook for a couple of minutes until it becomes a thick custard that separates from the side of the pan. Beat it hard with the spoon to keep it smooth. Pour into a small baking tray, smoothing to a square, about 8 x 8 inches and 1/2 inch deep. Cool and then chill.
Pour oil into a shallow skillet to a depth of about 1/2 inch and heat until very hot. Cut the custard into 12 squares. Beat the eggs on a plate and lift half the squares into the egg with a metal spatula. Coat, then lift them onto a tray of crumbs (big, stale crumbs are best, but dried will do), and coat all around.
Lift them with a clean palette knife into the oil and fry for a couple of minutes, spooning the oil over the top, until golden. Reserve on paper towel while you fry the second batch. Dust with sugar and cinnamon before serving. They can be served hot as well, but are excellent when chilled.

Six innovative ways to indulge in ice cream

Ice cream is a popular dessert that’s enjoyed across the globe. Blending the cold and the creamy, ice cream is an ideal treat on a hot day. According to IceCream.com, 87 percent of Americans have ice cream in their freezer at any given time. While Americans may enjoy their ice cream, New Zealand consumes more ice cream than any country in the world.
Historians and foodies believe Ancient Greeks enjoyed a dessert similar to ice cream as early as the 5th century B.C. Considering ice cream has been around so long, and that many cultures have created their own take on frozen treats, from gelato to sorbet to frozen yogurts, one may think there aren’t many new ways to indulge in this beloved dessert. But with a little creativity, anyone can come up with innovative ways to serve ice cream or any of its frozen cousins. The following are just a few different recipe inspirations.

  1. Lightly butter flour tortillas and sprinkle them with cinnamon and sugar. Drape the tortillas over the rungs of the shelves in an oven, placing a cookie sheet underneath to catch any drips. Bake at 300 F until just crisp. Fill with your favorite ice cream for some frozen dessert tacos.
  2. Create your own ice cream sandwiches from any firm cookies or dessert bars you have on hand. For example, cut two thin slices of fudge brownies. Spread softened ice cream in a complementary flavor, such as peanut butter or black cherry vanilla, in between the brownie sandwich pieces. Freeze to firm everything up and make it easier to eat.
  3. Fried ice cream pairs the seemingly incompatible frozen dessert with heat. Freeze scoops of ice cream until they are solid, dip them in an egg wash and coat with crushed cookie crumbs. You can then refreeze the finished ice cream balls and have them set to fry in time for dessert.
  4. Ice cream and frozen waffles make a quick dessert in a pinch. Raid the freezer for the ingredients, toast the waffles and then sandwich with ice cream. Top with fresh fruit and whipped cream, if desired.
  5. Spoon your favorite cookie dough into a muffin tin and mold the dough so it lines the individual cups of the tin. Bake until firm and let cool. Use the cookie cups to make little ice cream sundae holders for parties. Their diminutive size makes them ideal for kids.
  6. Whip up your own ice cream cake. Place a thin layer of any flavor cake on the bottom of a dish or pan that can be placed into the freezer. Scoop softened ice cream on top, then continue to layer as desired, finishing with ice cream as the final layer. Let freeze several hours until firmed up, then enjoy.

Ice cream can be enjoyed in cones, cups, a la mode or as part of soda floats. There is really no limit to what can be created with this popular dessert treat.

How to make pizza healthier

Pizza may have had humble beginnings, but today it is one of the most popular foods worldwide. More than five billion pizzas are sold across the globe each year, and pizza accounts for 10 percent of all food-service sales. 
Although pizza has many positive attributes, few consider pizza a healthy meal. Laden with cheese and high-calorie meats, pizza is often referred to as a guilty pleasure. However, there are a variety of ways to make the pizza you love better for your body.

  • Downplay the cheese. Pizza originated in Naples, Italy, and it has been said the first pizzas were comprised of just dough and sauce and no cheese. Restaurants that favor more authentic pizzas of the past will not rely heavily on cheese when preparing their pizzas. Instead of ordering a pizza with extra cheese, opt for minimal cheese to add just a subtle component of flavor to the pizza. Such an alteration to the recipe can reduce the saturated fat and cholesterol in pizza by a considerable amount.
  • Savor the tomatoes. Tomatoes provide a bevy of health benefits. The carotenoids, specifically lycopene, found in tomatoes have a number of beneficial properties, including preventing the oxidation of LDL cholesterol. According to a report from researchers at Athens Medical School that was published in Nutrition Research, a daily 70 gram portion of tomato paste containing roughly 33 mg of lycopene was associated with an improvement in flow-mediated dilation, a measure of a blood vessel's ability to relax. Tomatoes can help lower blood pressure, and they provide other heart benefits as well. Enjoying extra sauce on pizza and supplementing with sliced, cooked tomatoes can help make pizza healthier.
  • Choose whole-wheat crust. More restaurants are adding whole-grain pizzas to their menus. By switching to a whole-wheat crust, you can boost your fiber intake by as much as 50 percent. High-fiber foods help to regulate cholesterol levels in the blood and help you to feel fuller longer, reducing the likelihood that you will overeat. Fiber also helps the digestive tract by making a person more regular. Whole-grain foods have a lower glycemic index than processed grains as well, meaning they won't cause rapid blood-sugar spikes, which can be advantageous to those with diabetes.
  • Top pizza with vegetables. Instead of salt- and fat-heavy meats like pepperoni, ham or sausage, top your pizza with fresh vegetables. Peppers, tomatoes, olives, broccoli, and spinach each deliver a wealth of vitamins and minerals, and are a great way to add more fiber to your diet. 
  • Opt for thin-crust. Different areas of the country and the world favor different types of pizza. In the United States, New Yorkers prefer thin-crust pizza while the Windy City is synonymous with deep-dish pizza. While the debate continues as to which type of crust is better, switching to a thinner crust may have certain health benefits. Thick crusts pack more calories into each and every slice. When paired with cheese and other toppings, a slice of deep-dish pizza, while delicious, may contain more calories than is wise to eat in one sitting. Brick-oven pizza parlors generally offer whisper-thin crusts sparingly touched with cheese, sauce and basil to produce the classic Margherita pie, making such pizza a healthier alternative than New York- or Chicago-style pizza.
  • Pair pizza with salad. One way to make pizza healthier is to avoid overindulging. It is easy to overdo it with pizza, but try to cut your portion size in half, replacing that extra slice of pizza with a salad or side order of steamed vegetables to fill up without overindulging.
  • Pizza is a popular food across the globe. And while pizza may not be the healthiest food, a few simple ingredient changes can make pizza a much more nutritional meal. 

A tasty take on chicken

Chicken is a versatile food that can be served in various ways. Many cultures have their own unique takes on chicken, and each of those takes gives poultry a distinct flavor.
Foodies who want a northwestern United States take on poultry can try the following recipe for “Chicken Breasts with Roasted Red Peppers, Hedgehog Mushrooms and Truffled Cheese” courtesy of Jill Lightner’s “Edible Seattle: The Cookbook” (Sterling Epicure).

Chicken Breasts with Roasted Red Peppers, Hedgehog Mushrooms and Truffled Cheese
Serves 4

For the roasted red peppers:
2    red bell peppers
2    cloves garlic
2    tablespoons extra-virgin olive oil
    Freshly ground black pepper

For the stuffed chicken breasts:
4    boneless, skinless chicken breasts
3⁄4     stick (6 tablespoons) unsalted butter
1⁄4    pound hedgehog mushrooms
3    to 4 ounces truffled cow’s milk cheese
    Salt
    Freshly ground black pepper
3⁄4    cup all-purpose flour
2    tablespoons olive oil

1. Move the top oven rack so it’s about 5 inches from the broiler element. Preheat the broiler and line a baking sheet with aluminum foil. Place the whole peppers on the sheet and broil, turning them every few minutes, until their skins are entirely charred. Transfer to a bowl large enough to hold them, and cover the bowl with the foil. Allow the peppers to rest for 20 minutes.
2. Uncover the bowl and use a paring knife to remove the skins, stems and seeds, while capturing the juice and flesh in the bowl. Cut or tear the peppers into 1-inch-wide strips. Using the flat side of a large knife, crush the garlic cloves and remove the skins. Add the garlic, olive oil and salt and pepper to taste and allow the roasted peppers to marinate at room temperature for 2 hours, stirring occasionally.
3. Preheat the oven to 350 F. If the chicken breasts are large, insert a knife with a 1-inch blade into the center from the end of the breast, creating a pocket. Be careful not to pierce the outside. If the breasts are small, butterfly them out flat, cover with plastic wrap, and pound flat.
4. Melt 2 tablespoons of the butter in a small sauté pan and briefly cook the mushrooms until they’re soft, 3 to 4 minutes. Fill the pocket of each chicken breast with a strip of pepper, then some of the mushroom, then the cheese, and repeat until it can hold no more. Close the opening with a toothpick, season to taste with salt and pepper, and dredge in the flour.
5. Melt the remaining 4 tablespoons butter in a large ovenproof sauté pan, add the olive oil, and cook the breasts, turning until lightly browned.
6. Transfer the pan to the oven and bake the chicken until cooked through, about 20 minutes. Serve immediately. 

Add a taste of Thai to the end of grilling season

Though summer is the season for grilling, the arrival of Labor Day does not mean it's time to banish the grill to the back of your garage. Dedicated grillmasters have no problem firing up the grill in the dead of winter, but even those who are not so bold can still man the flames of an open grill long after Labor Day has come and gone.
Once the summer party season has ended, men and women may want to try their hands at dishes that might not be tailor-made for large backyard barbecues. Those who want to treat themselves to something new can try the following recipe for "Gai Yaang (Thai BBQ Chicken)" courtesy of Katie Chin's "Everyday Thai Cooking" (Tuttle).

Gai Yaang
(Thai BBQ Chicken)
Serves 4

4    bone-in chicken quarters with skin on

BBQ Marinade
8    garlic cloves, minced
1    tablespoon freshly ground black pepper
3    tablespoons fish sauce (nam pla)
2    tablespoons cooking sherry
1    tablespoon dark sesame oil
4    tablespoons palm or brown sugar
2    tablespoons minced lemongrass
1    fresh hot red or green chili, preferably Thai (deseeded if you prefer less heat), finely sliced
2    tablespoons honey

Dipping Sauce
1/2    cup rice or white vinegar
1/3    cup palm or brown sugar
1    tablespoon finely chopped shallots
11/2    teaspoons Asian chili sauce, preferably Sriracha
1    tablespoon fish sauce (nam pla)

1. BBQ marinade: Whisk together the garlic, pepper, fish sauce, sherry, sesame oil, palm sugar, lemongrass, chili, and honey. Place the chicken in a large sealable plastic bag. Pour the marinade over the chicken. Place in the refrigerator for at least 2 hours (up to overnight).
2. Dipping sauce: Bring vinegar, palm sugar, shallots, chili sauce, and fish sauce to a boil in a small sauce pan over high heat, stirring to combine. Reduce heat to medium low and allow to simmer for 10 to 15 minutes. Remove from heat.
3. Heat a grill to medium and brush with oil. Place the chicken on the grill skin side down and grill for about 15 minutes. Brush the uncooked side with the BBQ marinade, then flip the chicken over. Grill the second side for about 15 minutes. Discard the marinade. When the chicken is cooked through, transfer it to a serving platter and serve with the dipping sauce.
Cook's note: Keep a spray bottle filled with water nearby when grilling to prevent flare-ups.

Turn apple-picking excursions into apple pies

While fresh apples are a delight on their own, few apple afficionados can resist the temptation to make apple pie. If homemade apple pie is on your agenda this year, consider the following recipe for “French Apple Pie” from Mollie Cox Bryan’s “Mrs. Rowe’s Little Book of Southern Pies” (Ten Speed Press).

French Apple Pie
Makes one 9-inch pie

1    recipe Plain Pie Pastry (see below)

Raisin Filling
2⁄3    cup raisins
6    tablespoons water
1⁄2    teaspoon lemon juice
1⁄4    cup light corn syrup
11⁄2    teaspoons all-purpose flour
11⁄2    teaspoons sugar

2    apples (preferably a tart variety)
1⁄4    cup brown sugar
1⁄2    cup sugar
1⁄4    teaspoon ground cinnamon
1⁄2    teaspoon ground nutmeg
11⁄2    teaspoons cornstarch

Icing
1    cup confectioners’ sugar
2    tablespoons water
1    tablespoon butter, softened

To make the raisin filling, combine the raisins, water and lemon juice in a heavy saucepan over medium heat. Bring to a boil, then lower the heat to medium-low and cook, stirring occasionally until the raisins are plump, about 15 minutes.
Separately, combine the corn syrup, flour and sugar and mix well, then add to the raisins and continue cooking, stirring occasionally, until thick and syrupy, about 10 minutes. Remove from the heat and cool until the mixture is just warm, about 10 to 15 minutes.
Preheat the oven to 400 F. Line a 9-inch pie plate with 1 rolled-out crust.
Peel the apples, cut them into thin wedges, and put them in a large bowl. Separately, combine the sugars, cinnamon, nutmeg, and cornstarch, then add to the apples and gently stir until evenly mixed.
Spread the apple mixture in the crust in an even layer, then spread the raisin filling evenly over the apples. Brush the rim of the crust with water, cover with the second rolled-out crust, seal and flute or crimp the edges, and cut a steam vent in the center.
Bake for 40 to 50 minutes, until golden brown. Cool on a wire rack for 1 to 2 hours, until completely cool.
To make the icing, combine the sugar and water and mix well. Add the butter and mix until smooth. Brush over the top of the cooled pie before serving.

Plain Pie Pastry
Makes two 9-inch pie crusts

2    cups all-purpose flour
1    teaspoon salt
2⁄3    cup vegetable shortening
5     to 7 tablespoons cold milk

Sift the flour and salt into a bowl. Cut in the shortening with a pastry blender until it is the size of small peas. Sprinkle 1 tablespoon of the milk over part of the flour mixture. Gently toss with a fork and push to the side of the bowl. Sprinkle another tablespoon of milk over another dry part, toss with a fork and push to the side of the bowl. Repeat with the remaining milk until all of the flour mixture is moistened.
Press the dough together to form 2 equal balls, then flatten into disks. Roll out the crusts right away, or wrap the dough tightly, smoothing out any little wrinkles or air pockets and refrigerate for up to 2 weeks. On a lightly floured surface, roll out each ball to a thickness of 1⁄8 inch. Use a light touch and handle the dough as little as possible.

Enjoy jambalaya in the Creole tradition

Travel anywhere in the United States and you’re liable to find some delicious cuisine distinctive to a particular region. In Louisiana, Cajun and Creole cooking dominates many a restaurant’s menu. Jambalaya is one of the more beloved dishes in Louisiana, where locals know there’s a difference between Cajun jambalaya and Creole jambalaya. Creole jambalaya, such as the following recipe from Neal Corman and Chris Peterson’s “Virgil’s Barbecue Road Trip Cookbook” (St. Martin’s Press) includes tomatoes and is a hearty enough dish to serve on its own.

Jambalaya
Serves 4 to 6

Seasoning Mix
1    tablespoon dried parsley flakes
11⁄4    teaspoons cracked black pepper
2    teaspoons kosher salt
11⁄4    teaspoons sweet paprika
1⁄2    teaspoon dried basil
11⁄2    teaspoons dried thyme
3⁄4    teaspoon ground white pepper
11⁄2    teaspoons onion powder
11⁄2    teaspoons garlic powder

Jambalaya
2    pounds boneless, skin-on chicken thighs
12    shrimp, peeled, deveined, tail on
6    tablespoons unsalted butter, divided
1⁄4    cup olive oil, divided
5    ounces andouille sausage, finely diced
4    ounces Tasso ham, finely diced
2    cups finely diced yellow onions
1    cup finely diced celery
1 1⁄2    cups finely diced green bell pepper
1    tablespoon chopped garlic
3    dried bay leaves
1 3⁄4    cups converted rice
2    cups finely diced fresh plum tomatoes
1    cup clam juice
2    cups chicken stock
    Salt and pepper, to taste

  1. In a small bowl, blend the seasoning mix together and set aside.
  2. Cut each chicken thigh in half, and evenly dust the thighs with 11⁄2 tablespoons of the seasoning mix. Dust the shrimp with about 11⁄2 teaspoons of the mix.
  3. In a low and wide 6-quart (or larger) stockpot, add 1 tablespoon of the olive oil. Sauté the shrimp for about 1 minute per side. Remove the shrimp and set aside.
  4. Repeat the process with the chicken, using the remaining oil. Remove the chicken and set aside.
  5. In the same pot, brown the sausage and ham. Add the remaining butter, onions, celery, bell pepper, garlic, and bay leaves, and cook for 4 minutes.
  6. Add the rice, stirring to coat it with the mixture. Sauté for 2 minutes. Add the tomatoes and cook for 3 minutes more.
  7. Add the clam juice, chicken stock and chicken thighs. Bring to a boil, and then reduce to a simmer. Cook for 30 minutes, and then check the rice for tenderness and ensure the chicken is cooked through. 
  8. Fold in the shrimp and cook for another 3 minutes. Remove the bay leaves, taste, add salt and pepper, as desired, and serve.

A traditional take on a beloved dish

Hispanic cuisine is beloved the world over, and much of that infatuation can be traced to Mexico. Mexican cuisine is flavorful and can be enjoyed any time of year. But even ardent Mexican cuisine enthusiasts may never have tried authentic Mexican food. Many Mexican restaurants outside of Mexico offer only a hybrid form of this beloved cuisine that, while delicious, does not reflect traditional Mexican recipes. 
For those who want a taste of something more authentic, consider the following recipe for “Classic Rolled Tacos” from Kelley Cleary Coffeen’s “200 Easy Mexican Recipes” (Robert Rose).

Classic Rolled Tacos
Makes 24 tacos

2    cups shredded cooked beef (see below)
3⁄4    teaspoon salt
24    6-inch corn tortillas, micro-warmed (see note)
    Vegetable oil

1. In a large bowl, thoroughly combine shredded beef and salt.
2. To build tacos, place 11⁄2 tablespoons of meat at one end of each tortilla, shaping the filling into a short, straight line. Gently roll tortilla and secure with a toothpick (you do not need to seal the ends; the taco looks like a small flute). Deep-fry immediately or place rolled tacos in a resealable plastic bag to keep moist. Refrigerate until ready to cook for up to 2 days.
3. Fill a deep fryer, deep heavy pot or deep skillet with 3 inches of oil and heat to 350 F. Using tongs, gently place 3 to 4 tacos at a time in the hot oil and deep-fry, turning once, until golden brown and crispy, 2 to 3 minutes. Drain on paper towels. Lightly season with salt. Serve 3 or 4 per person.
Note: Micro-warning corn or flour tortillas gives you a very pliable and soft tortilla and allows you to roll the tacos tightly, so it’s perfect for preparing rolled tacos and taquitos. It is also quick and easy for soft tacos.

Boneless Beef

2    to 3 pounds boneless beef, chuck or sirloin roast
1    onion, quartered
3    cloves garlic
3⁄4    teaspoon salt

1. Place roast in a large pot and fill with enough water to cover the meat by 2 inches. Add onion and garlic and bring to a gentle boil over medium-high heat. Cover, reduce heat to medium-low and simmer until meat is tender and falling apart, 11⁄2 to 2 hours. Remove meat. Discard broth or use in another recipe. Let meat cool for 12 to 15 minutes. Shred meat into strands with your fingers or two forks. Add salt and mix well. Let cool completely. Measure out amount needed for recipe and place remaining beef in a resealable plastic bag. Refrigerate for up to 2 days or freeze for up to 3 months. 

Think outside the backyard barbecue box

While backyard barbecue menus are often dominated by hot dogs and hamburgers, hosts can expand that menu however they see fit. For example, fried chicken is a natural complement to popular backyard barbecue fare,ß such as potato salad and fresh watermelon.
Store-bought fried chicken can suffice in a pinch, but hosts who want to go the extra mile and offer a delicious homemade meal can prepare the following recipe for “Kansas City Fried Chicken” courtesy of Neal Corman’s “Virgil’s Barbecue Road Trip Cookbook” (St. Martin’s Press).

Kansas City Fried Chicken
Serves 4 to 6

1⁄2    cup buttermilk
1⁄2    cup hot sauce
51⁄2    tablespoons Fried Chicken
    Spice Mix (see below), divided
2    tablespoons kosher salt
2    4-pound whole roaster chickens, cut into 10 pieces each
5    cups all-purpose flour
21⁄2    cups canola oil

1. In a large mixing bowl, thoroughly blend the buttermilk, hot sauce, 2 tablespoons of the Fried Chicken Spice Mix, salt, and 1 cup cold water.
2. Press the chicken pieces into the marinade. Place in a covered container (ensuring that the chicken is covered with marinade), and refrigerate for 24 hours.
3. Thoroughly combine the flour with 31⁄2 tablespoons of the Fried Chicken Spice Mix in a medium bowl.
4. In a large and deep pan, or an electric skillet, add enough canola oil to fill the pan one-third full. Heat the oil to 350 F.
5. Set the marinated chicken next to the bowl of flour, close to the skillet. Remove a piece of chicken from the marinade, allow any excess to drain, then dredge in the flour mix. Shake off the excess flour and slide into the skillet.
6. Fry the chicken for 4 to 5 minutes on each side, or until the internal temperature reaches 165 F. Fry the chicken in batches, being careful not to crowd the skillet and to maintain the right temperature.
7. Remove the fried chicken to a sheet pan covered with three or four layers of paper towels. When all the chicken has been fried and dried on the paper towels, allow to cool slightly before serving.

Fried Chicken Spice Mix
Makes 2 cups, plus 2 tablespoons

6    tablespoons kosher salt
6    tablespoons sweet paprika
5    tablespoons onion powder
5    tablespoons garlic powder
3    tablespoons dry mustard
3    tablespoons cracked black pepper
1    tablespoon ground cumin
1    tablespoon dried thyme
1    tablespoon poultry seasoning
1    tablespoon dried oregano
1    tablespoon dried sage
1    tablespoon chili powder

Thoroughly blend all of the ingredients in a medium mixing bowl and transfer to a covered container. Keep in a cool, dry place until needed.

Enjoy summer with homemade sorbet

Dessert and summer are a match made in heaven. Sweltering summer afternoons might not be comfortable, but any discomfort can be quickly washed away with a refreshing dessert, such as the following recipe for “Kiwi Fruit Sorbet” from Lou Seibert Pappas’ “Ice Creams & Sorbets” (Chronicle Books).

Kiwi Fruit Sorbet
Makes about 1 quart

  • 2    teaspoons grated lime or lemon zest
  • 3⁄4    cup sugar, divided
  • 3⁄4    cup water
  • 2    pounds kiwi fruit (about 8 kiwi fruit), peeled and quartered
  • 6    tablespoons freshly squeezed lime or lemon juice
  • 2    limes, quartered

In a small bowl, mash the zest with 1 teaspoon of the sugar to release the oils. Combine the remaining sugar and water in a small saucepan and bring to a boil, stirring to dissolve the sugar. Cook until the syrup is clear. Remove from the heat and let cool to room temperature. In a food processor or blender, purée the kiwi fruit with the juice, syrup and sugared zest. Transfer to a container, cover and refrigerate until thoroughly chilled, about 3 hours.
Freeze in an ice cream maker according to the manufacturer’s instructions. Or, to freeze without an ice cream maker, pour the mixture into a 9-inch nonreactive square pan. Cover with aluminum foil or plastic wrap and freeze just until solid, 2 to 3 hours. Scrape out into an electric mixer or food processor and process briefly until light and fluffy. Serve at once or transfer to a container, cover, and freeze until firm, about 2 hours. At serving time, garnish with a lime wedge to squeeze over each serving.

Master Magical Marinades

Grilled foods boast inviting flavors that put many diners on the lookout for second helpings. Quite often the magic behind grilled meals lies in the marinade used to give foods that flavorful kick. 
Marinades can be used to enhance the flavor of meats, vegetables and poultry. While marinades add flavor, they also may be responsible for some other benefits in grilled foods.

Marinades add flavor
Defined as a savory acidic sauce in which food is soaked to enrich its flavor, marinades help break down fiber and tenderize certain foods. The base of many marinades include vinegar, lemon juice or wine, and marinades can be enhanced with spices, oil and herbs. 
It’s important not to let foods sit in marinades for too long, as any alcohol, acid or salt in the mixture can chemically “cook” the food in a process known as “denaturing.” Adhere to timing recommendations when using store-bought marinades, and keep such guidelines in mind when using homemade marinades as well. Many may tell you to let foods sit no longer than four hours. Marinades with citrus juices may require even less time for flavor to penetrate.
The timing of marinade use also will depend on the foods being marinated. Delicate items, such as seafood, may change with regard to texture or color in a matter of minutes. 
It’s important to always marinate foods in the refrigerator. Food left sitting out on a counter — even when it’s in a marinade — invites the growth of bacteria. If a recipe calls for marinating at room temperature, continue to marinate in the refrigerator, but extend the length of time you marinate. This helps to prevent foodborne illnesses. 
When marinating, use plastic or glass containers so the marinade does not cause a chemical reaction, which may occur if you marinate foods in metal containers. Discard all marinades for raw meats and poultry when the time comes to cook the foods, as leftover marinades may contain bacteria that makes them unsafe to reuse on other foods.

The nutritional benefits of marinating
In addition to flavor, marinades may improve the nutritional value of grilled foods. In 2008, researchers at Kansas State University discovered that marinating meat in antioxidant-rich spice blends can reduce the risk of forming heterocyclic amines, or HCAs, by more than 80 percent. HCAs are harmful, cancer-causing compounds that form when food chars over an open flame at high temperatures. Marinades must be rich in spices to have any HCA-busting properties. 
Marinades are a secret weapon in the creation of tasty, tender and healthy foods. They come in quite handy when grilling, and add an extra dose of flavor when cooking over high heat. 

How to grill for a crowd

Cooking over an open fire is a staple of warm-weather entertaining. Tossing some steaks or vegetables on the grill for a family dinner is usually an easy undertaking. But even the craftiest grill cooks may need to apply some tricks of the trade when grilling food for the masses.

  • Cook a large piece of meat. Rather than individual burgers or chicken wings, think about barbecuing an entire pig or a roast. In many cases, the meat can be set up on the barbecue early in the morning. By the time the evening arrives, the meat should be tender and cooked through. With just occasional checking, turning and basting, this may be the most low-maintenance option when feeding a crowd.
  • Rent or borrow a second grill. Unless you are working with industrial-sized or commercial equipment, a standard grill may not have enough surface area to cook a lot of food at once. Find a friend or family member who is willing to lend you his or her grill. Having twice the room means you can cook twice the amount of food. You also may be able to rent a larger grill for an event.
  • Precook the food. You can put bratwurst, hot dogs or burgers on the grill to partially cook them before the party, then store them in aluminum pans. When guests arrive, simply reheat the food to the right temperature and they'll be hot and ready in no time. 
  • Make steak sandwiches. Make the food go further with less work by cooking ribeye steaks or flank steaks on the grill. Slice up the meat and serve it over garlic bread with melted jack or mozzarella cheese. The result will be savory, and such sandwiches don't take much time to create.
  • Opt for pulled pork. Start the basics of pulled pork in a slow cooker so that the meat cooks for several hours under low heat. If you have a smoker, you can opt to use that, but smokers may take longer to cook the meat and require more maintenance. If you opt for the slow cooker, transfer the meat to an aluminum pan when it is nearly done and put it on the grill to impart that smoky flavor. Add more seasonings to the meat and keep it warm until guests are ready to dine.
  • Go with hot dogs. Hot dogs are usually precooked and will heat up quickly on the grill. Their small size means they don't take up much space, and several can fit on the grill at one time. 

Grilling for a crowd is easier when you plan with foods that are precooked or heat up quickly. This way you can enjoy more time with your guests.

Gather around the grill this Father's Day

It's all about remembering Dad's favorites on Father's Day. While everyone relaxes and enjoys the serenity of the backyard, these ribs will be slowly cooking to mouth-watering perfection.

Orange-Ginger Baby Back Ribs

Ingredients:
5    pounds baby back ribs

Sauce:

  • (1)     cup ketchup
  • (1/2) cup hoisin sauce
  • (4)    tablespoons soy sauce
  • (2)    tablespoons grainy mustard
  • (3)    tablespoons honey
  • (2)    tablespoons orange juice
  • (2)    tablespoons Asian chili sauce
  • (1)     tablespoon Worcestershire sauce
  • (4)    cloves garlic, minced
  • (1)     tablespoon ginger
  • Grated zest of an orange
  •  Salt and pepper

Directions:

  • Preheat the grill to medium and turn down to low. Prepare ribs for grilling by removing the membrane from the underside of the ribs.
  • Prepare several foil envelopes and place 2 strips of ribs into each envelope, with 1/4 cup of water and seal tightly.
  • Cook for 2 to 21/2 hours on low (300*F) with the lid closed. Check the thermometer on the front of the grill lid frequently and adjust the cooking temperature accordingly. This may require turning one or two burners off and cooking indirectly.
  • To prepare the sauce: Combine all ingredients in a saucepan and set aside until the ribs are ready to remove from the foil. Gently heat the sauce on the side burner for 10 to 15 minutes before using.
  • Carefully remove the ribs from the foil and place on grids. Baste generously with sauce, and grill for 10 minutes per side, leaving the lid open, turning several times, and basting with sauce after each turn.
  • Heat remaining sauce to a boil and then allow it to simmer for 5 to 10 minutes. Serve on the side as a dipping sauce.

Find additional recipes and grilling tips online at www.broilkingbbq.com.

Tips for perfectly grilled vegetables

One of the highlights of the summer season is the incredible bounty of fresh produce, and grilling these vegetables gives them a smoky, delicious dimension. Chef BBQ Naz, a grilling expert from Broil King, shares some simple tips for flavor perfection. 

  • When preparing vegetables, slice them to expose as much of the vegetable to the grill surface as you can.  
  • Coat vegetables with olive oil before placing them on the grill. This will help prevent them from sticking to the grill.  
  • Use the right tool for the job. Accessories like grill toppers and skewers are perfect for keeping smaller foods like cherry tomatoes and onions from rolling around or falling through the grate.  
  • Don't leave vegetables unattended. Vegetables are delicate and can easily overcook if not monitored.   
  • Grill extras. Leftover grilled vegetables are great in soups, salads, sandwiches and on pizzas and pasta.

When grilling vegetables, consider this popular recipe. 

Grilled Zucchini Rolls

Ingredients

  • (3) medium zucchinis, sliced 1/4-inch thick, lengthwise
  • (1) tablespoon olive oil
  • (4) ounces chevre (soft goat cheese), at room temperature
  • Pinch of freshly ground black pepper
  • Pinch of kosher salt
  • (2) tablespoons sun-dried tomatoes, oil-packed and minced
  • (1)  teaspoon oil from the sun-dried tomatoes
  • (1)  teaspoon fresh thyme, minced
  • (2) tablespoons Parmesan cheese, freshly grated

Directions

  • Preheat the grill on medium. 
  • Brush both sides of sliced zucchini with olive oil and sprinkle with salt. Place on the grill and cook for 4 minutes per side.
  • When cooked, set on a wire rack to cool.
  • In a small bowl, combine the chevre, salt, pepper, sun-dried tomatoes, oil and thyme.
  • Using a small spatula, spread the cheese mixture thinly over one side of the zucchini. Lightly roll the zucchini, and place seam side down on a small, parchment-lined baking sheet. Sprinkle with Parmesan cheese. Place baking sheet on top rack of the grill for 15 minutes.
  • Remove to a platter and serve.

Additional recipes and a complete vegetable grilling guide can be found at www.broilkingbbq.com.

How to grill the perfect burger

Could any food be as simplistic and delicious at the same time as a patty of beef on top of a crusty bun, served with lettuce, tomato and your choice of condiments? Burgers are the go-to item for barbecues, campouts, fast-food meals, and late night trips to the diner. A juicy burger can satisfy so many cravings in one sitting.

If ever there was a recipe to master, it would be grilling the perfect burger. Though barbecued burgers may seem easy to make, all too often burgers are botched by a few mistakes. But don't worry, burger mastery is within reach if you follow these simple tips.

  • Begin with fresh meat. Freshly ground meat will produce the best flavor. If you are unsure when the packaged ground beef was made, ask the butcher or someone in the meat department of the supermarket to grind you up a fresh batch. Otherwise, use a food processor or an attachment on a stand mixer to grind the meat yourself.
  • Fat has flavor. If you're going to indulge in a burger, make sure it has a fair amount of fat content. Fat helps keep the burgers moist and juicy. Make sure the fat content is about 18 to 20 percent of the mix. This helps to guarantee flavorful burgers.
  • Keep the meat cold. Chilled burger patties will firm up and hold their shape better during cooking. Leave the pre-made patties in the refrigerator until the last minute. Keep patties on ice if you will be cooking burgers in batches. 
  • Don't overhandle the meat. Compressing the meat and handling it too much can lead to dry, dense burgers. Avoid tough meat by handling it as little as possible. Keep your hands wet while shaping the patties so they'll come together easily.
  • Oil up the grill. A clean, well-oiled grill prevents burgers from sticking during cooking. 
  • Make sure the grill is super-hot. The goal is to cook burgers over high heat and fast. This is achieved with a very hot grill. It may only take three to five minutes per side to cook the burgers, depending on the thickness of the patty.
  • Flip only once. Wait until the burgers have been grilling for a few minutes and release easily from the grill grate. Flip them over and allow them to cook a few minutes more. This helps keep the juices inside the meat and prevents your burgers from turning into burnt hockey pucks.
  • Resist the urge to squash the burgers. Pushing down on the burgers with the spatula will only force the juices out. If you want dry burgers, press them down. If you want nice, juicy burgers, step away from the spatula.
  • Allow the burgers to rest. Take the burgers off the grill and let them rest for 5 minutes so that all of their juice redistributes through the patty. Toast your hamburger buns and then serve the burgers with your favorite toppings.

Dig in and enjoy your efforts, as well as the compliments from other diners.

Tasty meal gets kids cooking in the kitchen

Cheddar Beef Enchiladas are a meal that can be prepared and enjoyed by the entire family. Featuring familiar ingredients presented in a new way, they can satisfy even the pickiest of eaters.

Cheddar Beef Enchiladas are a meal that can be prepared and enjoyed by the entire family. Featuring familiar ingredients presented in a new way, they can satisfy even the pickiest of eaters.

Getting children to try new foods is not always easy. Kids have a tendency to be picky when it comes to the foods they eat, and many youngsters are reluctant to try all but the most familiar foods.


Getting kids to embrace a variety of foods may take time, but such a noble effort can produce successful results. Dining on different foods helps to develop the palate and also ensures that children are being exposed to an array of nutrients and vitamins that are essential for growing bodies.
One way to help children be more receptive to new foods is to involve them when choosing the menu and preparing meals. A youngster who went shopping, picked out foods and assisted in the kitchen may be more eager to try the final product than one who has not. 


Mexican-inspired dishes may be one way to put new foods on the dinner table. “Cheddar Beef Enchiladas” from “Casseroles, Slow Cooker & Soups” by Taste of Home editors (RDA Enthusiast Brands) features familiar ingredients combined with some more exotic flavors. Enchiladas can appeal to picky eaters. 

Cheddar Beef Enchiladas
Yield: 2 casseroles (5 to 6 enchiladas each)

  • 1    pound ground beef
  • 1    envelope taco seasoning
  • 1    cup water
  • 2    cups cooked rice
  • 1    can (16 ounces) refried beans
  • 2    cups shredded cheddar cheese, divided
  • 10   to 12 flour tortillas (8 inches), warmed
  • 1    jar (16 ounces) salsa
  • 1    can condensed cream of chicken soup, undiluted

In a large skillet, cook beef over medium heat until no longer, pink; drain. Stir in taco seasoning and water. Bring to a boil. Reduce heat; simmer, uncovered, for 5 minutes. Stir in rice. Cook and stir until liquid is evaporated.
Spread about 2 tablespoons of refried beans, 1⁄4 cup of the beef mixture and 1 tablespoon cheese down the center of each tortilla; roll up. Place seam-side down in two greased 13x9x2-inch baking dishes.
Combine salsa and soup; pour down the center of the enchiladas. Sprinkle with remaining cheese. Bake one casserole, uncovered, at 350 F for 20 to 25 minutes or until heated through and cheese is melted. Cover and freeze remaining casserole for up to 3 months.
To use frozen casserole: Thaw in the refrigerator overnight. Cover and bake at 350 for 30 minutes. Uncover; bake 5 to 10 minutes longer, or until heated through and cheese is melted. 

Homemade pizza with a tasty twist

Few foods are as popular as pizza. Whether you’re a vegetarian or someone who prefers pizza topped with pepperoni, chances are you can find some form of this beloved dish that will tickle your foodie fancy.
Those who want to experiment with making their own pizzas can do so with the following recipe for “Wheat-Free Pizza With Roasted Vegetables” from Maxine Clark’s “Pizza, Calzone & Focaccia” (Ryland, Peters & Small). The dough is designed to be a departure from traditional pizza dough, providing  a crisp exterior crust that covers a chewy, sponge-like interior. 

Wheat-Free Pizza With Roasted Vegetables
Makes 1 9-inch pizza

  • 1⁄2    eggplant, cubed
  • 1    small red bell pepper, seeded and cut into strips
  • 1    small zucchini, sliced
  • 2    garlic cloves, sliced
  • 1⁄3    cup olive oil, plus extra to drizzle
  • 3    tablespoons each milk and water, mixed together and warmed
  • 3⁄4    teaspoon freshly squeezed lemon juice
  • 1    egg
  • 1⁄2    teaspoon salt
  • 1 3⁄4    cups gluten-free white flour
  • 1    teaspoon quick-rising yeast
  • 2 1⁄2    ounces mozzarella, drained and cubed (optional)
  • Sea salt and freshly ground black pepper
  • Preheat the oven to 400 F. 

Toss the eggplant, red bell pepper, zucchini, and garlic in 4 tablespoons of the olive oil and roast in a roasting pan in the oven for 15 to 20 minutes, or until they are beginning to soften.
While the vegetables are roasting, make the batter. Whisk the warm (not hot) milk and water, lemon juice, remaining olive oil, egg, and salt together. Beat in the flour and yeast and mix until well combined. Pour into the prepared pizza pan, cover, and let rise in a warm place for about 20 minutes, or until puffy.
Bake the pizza crust in the oven for 10 minutes to set the dough, then quickly remove from the oven and scatter with the roasted vegetables and mozzarella (if using). Season well, drizzle with olive oil, and return to the oven for a further 10 minutes until the vegetables are sizzling and the pizza has slightly shrunk from the edges. Cut into wedges and serve hot.

Contemporary Italian From The Comforts of Home

Gourmet cuisine need not be reserved for special nights out on the town. Those who want a taste of the good life at home can cook up the following recipe for "Polenta con Rape e Pancetta (Baked Polenta With Sautéed Broccoli Rabe and Pancetta)" courtesy of Michael White and Joanna Pruess' "Fiamma: The Essence of Contemporary Italian Cooking" (Wiley).

Polenta con Rape e Pancetta

(Baked Polenta With Sautéed Broccoli Rabe and Pancetta)

Makes 6 appetizer servings

2 cups Homemade Chicken Stock (see below)Sea salt

11/3 cups coarse yellow cornmeal, or substitute instant polenta

1/4 cup extra-virgin olive oil

6 ounces thickly sliced pancetta, cut into 1/4-inch cubes

1 large yellow onion, thinly sliced

2 large cloves, thinly sliced

1/2 teaspoon red pepper flakes

2 pounds broccoli rabe, thick stems removed and discarded, cut into 3-inch lengths

Freshly ground black pepper

1/2 cup freshly grated Pecorino Romano cheese

Preheat the oven to 425 F. Lightly oil an 8- x 111/2-inch or 9- x 13-inch baking dish.

In a medium-size saucepan, bring the chicken stock and 2 cups water to a boil. Add 1 teaspoon salt and gradually whisk in the cornmeal until smooth. Cook over medium heat, stirring with a wooden spoon until it has thickened, about 10 minutes. Pour the polenta into the oiled baking dish and smooth the top; brush the top with 1 tablespoon of the olive oil. Bake for 1 hour 15 minutes, or until the top and bottom are golden and crusty.

Meanwhile, in a large deep skillet, heat the remaining 3 tablespoons of olive oil over medium-high heat until hot but not smoking. Stir in the pancetta and cook until golden, 4 to 5 minutes, stirring frequently. Add the onion, garlic and pepper flakes and cook, stirring until the onion softens, 5 to 6 minutes. Add the broccoli rabe and 1/4 cup water, season to taste with salt and pepper, and toss gently. Cover and cook until the broccoli rabe is softened, about 5 minutes. Uncover and cook, stirring occasionally, until the water has evaporated and the broccoli rabe is completely tender, 2 minutes longer.

Cut the polenta into 6 equal pieces and transfer them to 6 small plates or, using a small circular cutter, cut the polenta into circles. Stir 1/4 cup of the Pecorino into the broccoli rabe and spoon it over the polenta. Sprinkle with the remaining 1/4 cup of the Pecorino and serve.

Fondo di Pollo

(Rich Chicken Stock)

Makes about 4 quarts

2 tablespoons olive oil

3 pounds uncooked chicken carcasses with a little meat on them, plus wings, backs and ribs chopped into 11/2-inch pieces

1 medium-large yellow onion, chopped (1 cup)

2 medium ribs celery with leaves, trimmed and chopped (3/4 cup)

1 medium carrot, peeled and chopped (3/4 cup)

5 cloves garlic, cut in half

1 tomato, chopped

1 tablespoon tomato paste

1/2 cup dry white wine, such as Pinot Grigio or Trebbiano

2 bay leaves

5 sprigs fresh flat-leaf parsley

4 sprigs fresh thyme

Sea salt and freshly ground black pepper

Heat the oil in a large deep skillet or roasting pan over medium-high heat until hot. Add the chicken bones and cook until golden brown, 8 to 10 minutes, turning occasionally. Add the onion, celery, carrot, and garlic and cook, stirring occasionally, until the vegetables are golden brown, 7 to 8 minutes.

Stir in the tomato and tomato paste and cook, stirring occasionally, for 5 minutes. Pour in the white wine and cook for 2 minutes more. Add 2 quarts water, bay leaves, parsley, and thyme. Simmer for 1 hour, skimming the surface from time to time. Pour the liquid through a fine strainer into a clean pot, pressing to extract as much liquid as possible. Season to taste with salt and pepper. To intensify the flavor, if desired, reduce the stock over high heat. The stock will last for 3 to 4 days in the refrigerator or for 6 months in the freezer when stored in an airtight container. 

Possibly the best summer treat??? Iced Tea Smoothies!

While national iced tea day may not get the hype of, say, National Donut Day, Waffle Day or Tapioca Pudding Day (a real thing), iced tea day is worth celebrating for one reason: It’s the easiest way to sip away the pounds while looking, feeling and living better than ever.

More and more research has shown that different types of tea possess different micronutrients that do everything from revving your metabolism to blocking the formation of new fat cells to actually working on your body at a genetic level, reversing your inherited tendency to gain weight and making it easy — effortless, in fact — to drop pounds quickly 

Best part: Mix that tea into an Iced Tea Smoothie and the weight-loss benefits get turbocharged because:

  You stay fuller longer when you drink thick drinks.

  Drinking meal replacements increase your chance of losing weight and keeping it off for more than a year.

  Did we mention smoothies taste like dessert?

So yes, tea smoothies please! Here are the best-ever iced tea smoothies you can make at home, courtesy of The 7-Day Flat-Belly Tea Cleanse, so you can have your best body ever all year long. And check to see if your local shop is offering free tea drinks today — like Teavana. The Starbucks spin-off is giving away Pineapple Berry Blue iced teas — yum!

The Iced Tea Smoothie Secrets 

Smoothie Secret 1: Use tea made from loose green tea leaves as your base. A report by ConsumerLab.com, an independent site that tests health products, found these to be among the best and most potent source of antioxidants like EGCG. And because its mild taste makes for a pleasant smoothie base (unlike harsher black teas), each of the recipes here use the life-giving drink as a jumping-off point. Make a big pot of it and keep it chilling in your fridge for daily smoothie building. 

Smoothie Secret 2: Respect the ratio. Once you learn the basic proportions of liquids to solids, you can turn anything into a pretty drinkable smoothie. For every 3 cups of fruit, you’ll need about 1 cup of tea. Keep in mind that both yogurt and ice will thicken your drink.

Smoothie Secret 3: Look to the freezer. Not only is frozen fruit considerably more affordable, but research has found that frozen fruits may actually carry higher levels of antioxidants because they’re picked at the height of season and flash frozen on the spot. Also, frozen fruit means you can use less ice to make your smoothie sufficiently cold, which in turn yields a more intense, pure flavor.

The 6 Best-Ever Iced Tea Smoothies

The Blue Monster

1 cup blueberries

½ cup green tea

½ cup yogurt

3 or 4 cubes of ice

1 Tablespoon flaxseed

Between the polyphenols in the blueberries and the pomegranate and the omega-3s in the flax, we’re talking serious brain food.

178 calories, 4 g fat, 18 g sugars


Papaya Berry

¾ cup frozen papaya

¾ cup frozen strawberries

½ cup milk

½ cup green tea

1 Tablespoon fresh mint

This is like a liquid multivitamin, loaded with vitamins A and C, plus disease-fighting carotenoids and lycopene.

118 calories, 2 g fat, 20 g sugars

The Green Goddess

¼ avocado, peeled and pitted

1 ripe banana

1 Tbsp honey

½ cup milk

½ cup green tea

½ cup ice

Optional: 1 tsp freshly grated ginger

Fiber and protein combine forces to vanquish any hunger in this untraditional, but tasty creation.

350 calories, 12 g fat, 32 g sugars

The Green Banana

1 very ripe banana

½ cup green tea

½ cup milk

1 Tablespoon peanut butter

1 Tablespoon agave syrup

1 cup ice

With protein, healthy fat, and caffeine, this works perfectly as a start to your day or as a low-cal substitute for a milk shake.

311 calories, 10 g fat, 38 g sugars

The Orange Crush

¾ cup frozen mango

½ cup carrot juice

½ cup green tea

½ cup Greek yogurt

1 Tablespoon protein powder

½ cup water

All that orange produce means this baby is stuffed full of vision-strengthening, cancer-fighting carotenoids.

210 calories, 1 g fat, 22 g sugars

Pineapple Punch

1 cup frozen pineapple

½ cup Greek-style yogurt

½ cup milk

½ cup green tea

Like a tropical island in a glass. In fact, a shot of rum would turn this into one heck of a healthy cocktail.

180 calories, 2 g fat, 22 g sugars


https://www.yahoo.com/food/6-best-ever-iced-tea-smoothies-for-summer-121130917911.html

4th of July Strawberries

Bright red strawberries, white chocolate, and some blue sprinkles are not only the perfect combination but super patriotic for this time of year! Easy, fast, and fun for the whole family!

INGREDIENTS

  • 12 large strawberries
  • 4 ounces white chocolate or white candy coating (about 2/3 cup chopped)
  • 1/4 cup blue sprinkles

PREPARATION

1. Wash the strawberries and gently pat them dry with paper towel. Make sure they're completely dry. Place the blue sprinkles in a small bowl.

2. Melt the white chocolate or candy coating in a small microwave-safe bowl. White chocolate scorches easily, so stir it after every 30 seconds to keep it from overheating. Stir until it's melted and smooth.

3. Holding a strawberry by the stem, dip it about two-thirds into the white chocolate. Since these are Red, White, and Blue Strawberries, make sure you leave a visible red portion at the top of the berry. Place the strawberry on a baking sheet lined with parchment or waxed paper, and repeat until all of the berries are dipped. Refrigerate the tray briefly to set the chocolate, for about 5 minutes.

4. Dip the bottom third of a berry in the white chocolate, then immediately roll it in the blue sprinkles until the bottom third is covered in blue. You can skip the double-dipping and just roll it in sprinkles the first time you dip the berries in chocolate, but I find that's messier and more difficult to control, so I like double-dipping. Repeat until all of the berries have a bottom layer of blue sprinkles.

5. Refrigerate the tray until the white chocolate is completely set, and store Red, White, and Blue Strawberries in the refrigerator until ready to serve. These candies are best enjoyed the same day they are made.

6. ENJOY!


http://candy.about.com/od/july4thcandies/r/Red-White-And-Blue-Strawberries.htm